

Intel’s storage feature boosts performance by using RAID and SSD caching. Many systems use it for better data handling.
Some users might want to turn off this feature. This could be due to software or hardware issues. Or, they might be trying to fix system errors.
Trying to disable IRST without the right steps can be risky. It might lead to losing data or system crashes.
This guide on Intel Rapid Storage Technology is here to help. It shows safe ways to change your system settings.
Knowing the right steps keeps your data safe and your system working well. Getting expert advice is key when making these changes.
What is Intel Rapid Storage Technology?
Intel Rapid Storage Technology (IRST) plays a key role in making your computer faster and safer. It’s a smart way to manage data across different storage devices. This ensures your data stays safe and works well.
Definition and Primary Functions
Intel Rapid Storage Technology (IRST) is a top-notch storage manager. It boosts your computer’s speed and keeps your data safe. It works with different storage setups, giving you more control.
The main Intel RST functions are combining drives, speeding up your system, and safeguarding against drive failures. It’s great for those who need fast and reliable storage.
Related Posts:
- What Is Lead Capture Technology for Events…

- What Does CPE Stand for in Technology Customer…

- How Technology Affects Privacy Data Security in the…

- How to Make Money in Information Technology Careers…

- What Are Ethics in Information Technology A Guide to…

- How Technology Impacts Us The Broad Effects on Daily Life

Core Components of IRST
IRST has several important parts that work together:
- Device drivers for talking to hardware and the operating system
- Management software for setting things up
- Firmware in Intel chipsets
- Caching algorithms for better data placement
These parts make sure your storage devices work better together.
How IRST Enhances System Performance
Intel Rapid Storage Technology boosts your system in several ways. It manages data across devices to make things faster and more responsive.
One big plus is how it uses fast storage to cache data from slower drives. This gives you fast performance without needing all SSDs.
RAID Configurations and Caching
RAID caching is a key feature of IRST. It supports various RAID levels, like:
- RAID 0 for better performance
- RAID 1 for data safety
- RAID 5 for a good balance
- RAID 10 for top-level needs
The caching system stores often-used data on faster media. This makes apps and files load much faster.
Many makers, like HP, use IRST to boost storage performance right out of the box. This shows how useful IRST is in real-world use.
With its advanced management, Intel Rapid Storage Technology offers a strong storage solution. It meets your needs for speed, safety, and flexibility.
Reasons to Disable Intel Rapid Storage Technology
Intel Rapid Storage Technology (IRST) is useful for many. Yet, there are times when turning it off is better. Knowing when to do this can help you set up your system right.

Performance Optimisation Considerations
IRST might not always make things faster. In some cases, it can even slow things down.
Scenarios Where IRST May Hinder Speed
Older systems or those with just one drive don’t get much from IRST. It adds extra work that can slow things down. Disabling IRST can make boot times and app performance better.
Another issue is with TRIM support. Some turn off IRST to get full TRIM on SSDs. This keeps the drive running smoothly.
Compatibility and Driver Issues
Driver problems are a big reason to disable IRST. These issues can make your system unstable.
Common Software Conflicts
IRST can sometimes fight with other storage tools or security software. This can lead to system crashes or odd behaviour.
Many see the “INACCESSIBLE_BOOT_DEVICE” error when IRST drivers clash with Windows updates. This error often means you need to turn off IRST to fix things.
Linux users might disable IRST to get along better with their OS. IRST is mainly for Windows and can cause problems with Linux.
Personal Preference and Control
Some people like to manage their storage manually. Turning off IRST gives them more control and clarity over their storage.
Custom system builders often choose AHCI mode for better drive compatibility. This gives them more flexibility than IRST’s set ways.
Knowing why you might want to disable IRST can help you decide if it’s right for you and your system.
Risks of Turning Off Intel Rapid Storage Technology
Before you disable Intel RST, think about the possible risks. Knowing these can help you decide if it’s the right move.
Potential Data Loss Scenarios
Disabling IRST can lead to data loss worries. It handles storage setups, like RAID arrays, which might not work if turned off wrong.
Systems with RAID 0, 1, 5, or 10 are at high risk. Without IRST, the system might not see the storage, making data hard to get back.
- Make backups of important data on different devices
- Check your backups are good before making changes
- Keep a record of your current storage setup
- Have recovery media for your operating system ready
System Stability and Boot Problems
Turning off IRST can also affect system stability. It’s deeply linked with system operations, and removing it might cause odd behaviour.
Performance might drop in some storage tasks. The system could slow down during tasks that IRST used to speed up.
| Potential Issue | Likelihood | Severity Level | Recovery Complexity |
|---|---|---|---|
| Boot failure | Medium | High | Complex |
| RAID array recognition failure | High | Critical | Very complex |
| Reduced disk performance | High | Medium | Moderate |
| Driver conflicts | Low | Medium | Simple |
Identifying Stability Issues
Spotting system boot issues early can prevent bigger problems. Look out for these signs after disabling IRST:
Long boot times or not getting to the OS are red flags. Crashes during disk-heavy tasks point to compatibility issues.
Check system event logs for storage errors. These logs can help figure out what’s causing stability problems.
Blue screen errors about storage drivers or disk management often mean IRST was turned off wrong. Keep a record of these errors for troubleshooting.
Pre-Disable Checklist: Ensuring Safety
Before you disable Intel Rapid Storage Technology, it’s vital to prepare well. This checklist helps you avoid risks and makes the transition smoother.
Backup Your Data Securely
Backing up your data is the most important IRST disable precaution. Problems during the disable process could harm your data.
Always backup data before disabling IRST. This simple step can save you from big data recovery problems later.
Recommended Backup Methods
Here are some top backup strategies:
- Full system image backup: Creates a complete snapshot of your entire system
- Cloud storage solutions: Services like OneDrive or Google Drive for important files
- External hard drive copies: Physical backups provide offline security
- File history feature: Windows’ built-in versioning system for document protection

Verify System Configuration and Dependencies
A system configuration check is key to avoid compatibility issues. It ensures your system works well without IRST.
Use Windows Disk Management to spot hidden drives, like Optane memory. This helps you understand your storage setup before making changes.
Key Settings to Review
Before you start, check these important system settings:
- SATA operation mode: Check if your system uses RAID, AHCI, or IDE mode
- Driver versions: Make sure storage drivers are up-to-date and compatible
- Motherboard specifications: Check if your motherboard works with standard AHCI mode
- Boot configuration: Make sure your system can boot without IRST drivers
By following this checklist, you can greatly reduce risks when disabling Intel Rapid Storage Technology. These steps prepare you well for the actual disable process.
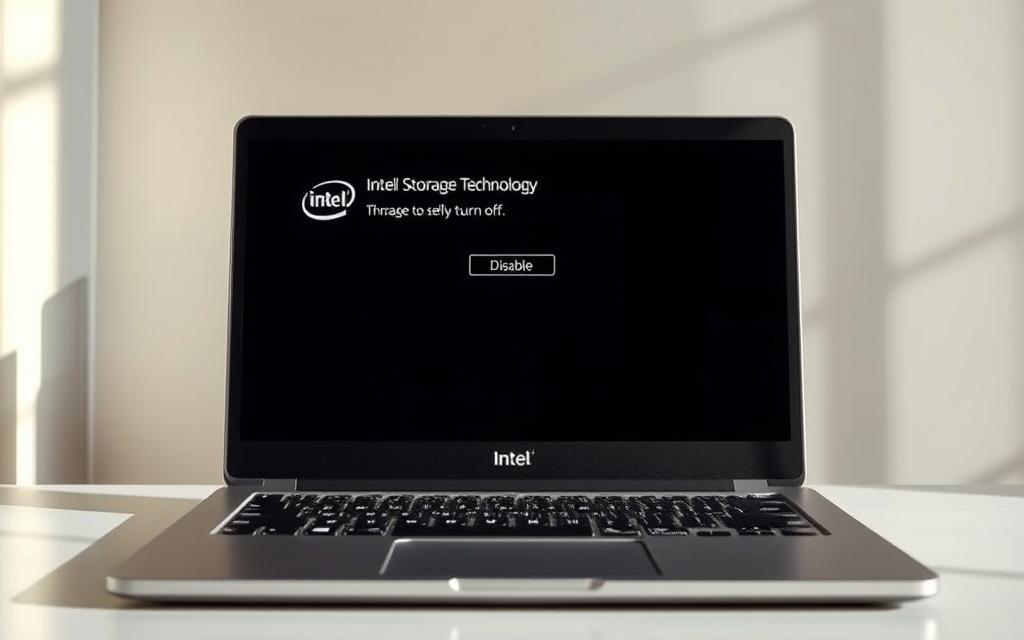
Can I Turn Off Intel Rapid Storage Technology? Step-by-Step Guide
To disable Intel Rapid Storage Technology, you need to go through your system’s BIOS/UEFI settings or Windows itself. This guide will show you how to do it in both ways. It’s designed to make the process easy and smooth.
Disabling IRST via BIOS/UEFI Settings
To disable IRST in BIOS, you’ll need to change your storage controller settings. This method changes your system’s settings before Windows starts.
Accessing BIOS/UEFI on Major Motherboard Brands
Each motherboard brand has its own key to enter BIOS/UEFI settings:
- ASUS, MSI, Gigabyte: Typically use Delete key
- Dell, HP, Lenovo: Usually F2 or F10
- Acer: Frequently F2 or Delete
- Intel motherboards: Commonly F2
Look for on-screen instructions during startup to find the right key for your system. You might need to press it several times right after turning on.
Locating and Modifying IRST Options
In your BIOS/UEFI settings, find the storage options. The names might vary, but they’re usually in sections like:
- SATA Configuration
- Storage Options
- Advanced Settings
- Integrated Peripherals
Look for the SATA Mode or Storage Controller Mode. Change it from RAID or Intel RST to AHCI. This disables IRST at the hardware level.
Save your changes (usually F10) and exit. Your system will restart with IRST turned off.
Disabling IRST within Windows Operating System
If you prefer working in Windows, you can turn off RST in Windows through driver management and software removal.
Using Device Manager for Disablement
Device Manager is a simple way to disable the IRST controller without uninstalling it:
- Right-click the Start button and select Device Manager
- Expand the “Storage controllers” section
- Right-click the Intel Rapid Storage Technology controller
- Select “Disable device” from the context menu
- Confirm any warning prompts that appear
This method temporarily disables the controller while keeping drivers ready for future use.
Uninstalling IRST Software and Drivers
To fully remove IRST, you’ll need to uninstall Intel RST drivers and software:
- Open Programs and Features from Control Panel
- Locate “Intel Rapid Storage Technology” in the installed programs list
- Select Uninstall and follow the prompts
- Reboot your system when prompted
After rebooting, Windows will install standard AHCI drivers for your storage controllers. If your system has Intel Optane memory, remove the Optane module first to avoid system issues.
For those who are more advanced, using the Command Prompt with “bcdedit /set safeboot minimal” can change drivers. But, this method requires extra steps to switch back to normal boot operations.
Verifying IRST is Disabled and System Check
After disabling Intel Rapid Storage Technology, it’s important to check if it worked right. This step makes sure your system works well without any problems.

Confirmation Steps Post-Disablement
There are several ways to make sure IRST is off. These methods show that your changes were made correctly.
Tools and Commands for Verification
Windows has tools to see if your storage settings are correct. Device Manager is the easiest way to check visually.
Open Device Manager and look at the “Storage controllers” section. If IRST is off, you won’t see “Intel(R) Rapid Storage Technology”. Its absence means it’s disabled.
To check with commands, open Command Prompt as an admin. Type bcdedit /enum to see your boot settings. Look for drivers that are not IRST.
Another command is sc query iaStorAVC. If it says the service doesn’t exist, IRST is gone.
Monitoring System Performance Afterwards
After disabling IRST, watch how your system works. This helps find any good changes or problems.
Notice how fast your system boots and apps load. Some people say disabling IRST makes their system work better with certain software.
Signs of Successful Disablement
There are signs that show IRST was disabled right. These signs mean the process worked as planned.
Your system should start up without any storage errors. Apps that used to crash might now work fine. Disk management tools should show AHCI or RAID, not IRST.
The table below shows important things to check after disabling IRST:
| Performance Aspect | Expected Change | Monitoring Method |
|---|---|---|
| Boot Time | Consistent or improved | System startup timing |
| Disk Operations | Stable performance | Task Manager performance tab |
| Application Compatibility | Potential improvement | Software functionality testing |
| System Stability | No new crashes | Error log monitoring |
Check your system for a week after disabling IRST. This lets you see how it works under different conditions.
Confirming IRST is off means your system works how you want it. It stays safe and stable too.
Troubleshooting Common Issues After Disabling
Even with careful preparation, some users might encounter unexpected challenges after disabling Intel Rapid Storage Technology. This section addresses the most frequent problems and provides practical solutions to help you navigate these situations effectively.

Boot Errors and Recovery Solutions
System boot problems represent one of the most common troubleshoot IRST disable issues users encounter. When your computer fails to start properly after disabling IRST, several recovery options exist to restore functionality.
If your system displays error messages during startup or fails to load Windows, try these recovery methods:
- Access Safe Mode by pressing F8 during boot (or Shift + Restart in Windows 10/11)
- Use System Restore to revert to a previous working configuration
- Check BIOS/UEFI settings to ensure boot priority is correctly configured
- Verify that all storage drivers are current and compatible
Resolving Blue Screen or Crash Problems
Blue screen errors or system crashes often indicate driver conflicts or hardware recognition issues. These typically occur when the system attempts to access storage devices without proper driver support.
To fix boot errors after turning off RST that manifest as blue screens:
- Boot into Safe Mode with Networking
- Access Device Manager and check for warning icons on storage controllers
- Update or reinstall standard SATA/AHCI controllers
- Run Windows Update to obtain latest driver versions
- Perform a clean boot to identify conflicting software
Restoring IRST if Necessary
If troubleshooting proves unsuccessful or system performance deteriorates significantly, you might consider reactivating Intel Rapid Storage Technology. This approach can resolve compatibility issues while maintaining data integrity.
Before proceeding, ensure you have created recent backups and documented your current system configuration. The restoration process varies slightly depending on your original disablement method.
Re-enabling Steps and Precautions
To safely re-enable Intel RST, follow these steps while observing important precautions:
| Method | Steps | Precautions |
|---|---|---|
| BIOS/UEFI Reactivation | 1. Enter BIOS/UEFI settings during boot 2. Navigate to SATA operations 3. Change from AHCI to RAID mode 4. Save changes and exit | Ensure system support for RAID mode Have installation media ready |
| Windows Reinstallation | 1. Download latest IRST drivers 2. Install through Device Manager 3. Restart system when prompted 4. Verify operation in IRST console | Create system restore point first Check driver compatibility |
| Full System Restoration | 1. Use system image backup 2. Restore to pre-disablement state 3. Reconfigure IRST settings 4. Update to latest version | Verify backup integrity beforehand Ensure sufficient storage space |
After reactivation, monitor your system carefully for several days. Check boot times, application performance, and storage responsiveness to confirm successful restoration.
Remember that reactivation might require additional driver updates or configuration adjustments. Always keep your data backed up throughout this process to prevent data loss.
Conclusion
This guide has given you a detailed look at Intel Rapid Storage Technology. It shows why and how to safely turn it off. Your choice to disable IRST should match your system’s needs, whether for better performance or to fix compatibility issues.
Remember to back up your data before making any changes. Switching storage modes can cause unexpected problems. Knowing the difference between RAID and AHCI modes helps you set up your system for the best stability and speed.
If you need more help, check out Intel’s official support pages. This guide’s conclusion stresses the need for making informed decisions about your storage technology.
These final thoughts aim to give you the knowledge to make safe choices. This way, you can improve your PC’s performance without risks. This summary is a handy guide for future setup changes.
